Fridgescaping: How to Organize Your Fridge So Nothing Goes to Waste
Fridgescaping is about organizing your fridge into clear zones based on the principle of "everything visible and easy to reach," so food doesn't get lost on the back shelves and spoil. You can do a basic fridgescaping in 6 steps and about 45–60 minutes: clear out, clean, zone, relocate items, label, and set up quick habits to maintain order.
Below is a step-by-step guide that works for both small families and roommates: less spoiled food, faster cooking, and a clearer idea of what needs to be bought.
Step 1. Do an Audit: Remove Expired Items and "Lost" Food
This step is the foundation of fridgescaping: as long as the fridge is chaotic, no containers will save you. Your goal is to keep only what you can and want to eat.
Take everything out of the fridge and place it on the counter (if possible, keep items from the same shelf together to make it easier to put them back).
Immediately throw away anything expired or suspicious: swollen packages, slime, strong odors, mold (except for noble cheeses, if you're sure).
Divide the remaining items into 3 groups: "eat first," "stores fine," and "needs freezing."
Check the expiration dates of opened sauces, dairy, sausages, and ready-made meals—these are the items that most often go unnoticed.
Practical tip: If you don't live alone, agree on a simple rule: everything opened should have an opening date (you can use a marker on masking tape).
Step 2. Clean and "Reset" the Space to Prevent Odors from Affecting Food
A clean fridge is not just about the aesthetics of fridgescaping; it's also a real way to prevent spoilage. Leftover sauces and crumbs accelerate the development of odors and bacteria.
Unplug the fridge or set it to minimum mode while cleaning (if your model allows).
Remove shelves and drawers. Wash them with warm water and a mild detergent, then dry them thoroughly.
Wipe the interior with a baking soda solution (1 tbsp per 1 liter of water) or a mild neutral cleaner. Do not use harsh abrasives.
Check the drainage hole (if present)—a clog often causes unpleasant odors and excess moisture.
If it smells "off": place an open box of baking soda or a charcoal odor absorber inside.
If it's constantly damp: check the temperature and how tightly the door seals—condensation accelerates spoilage of greens and berries.
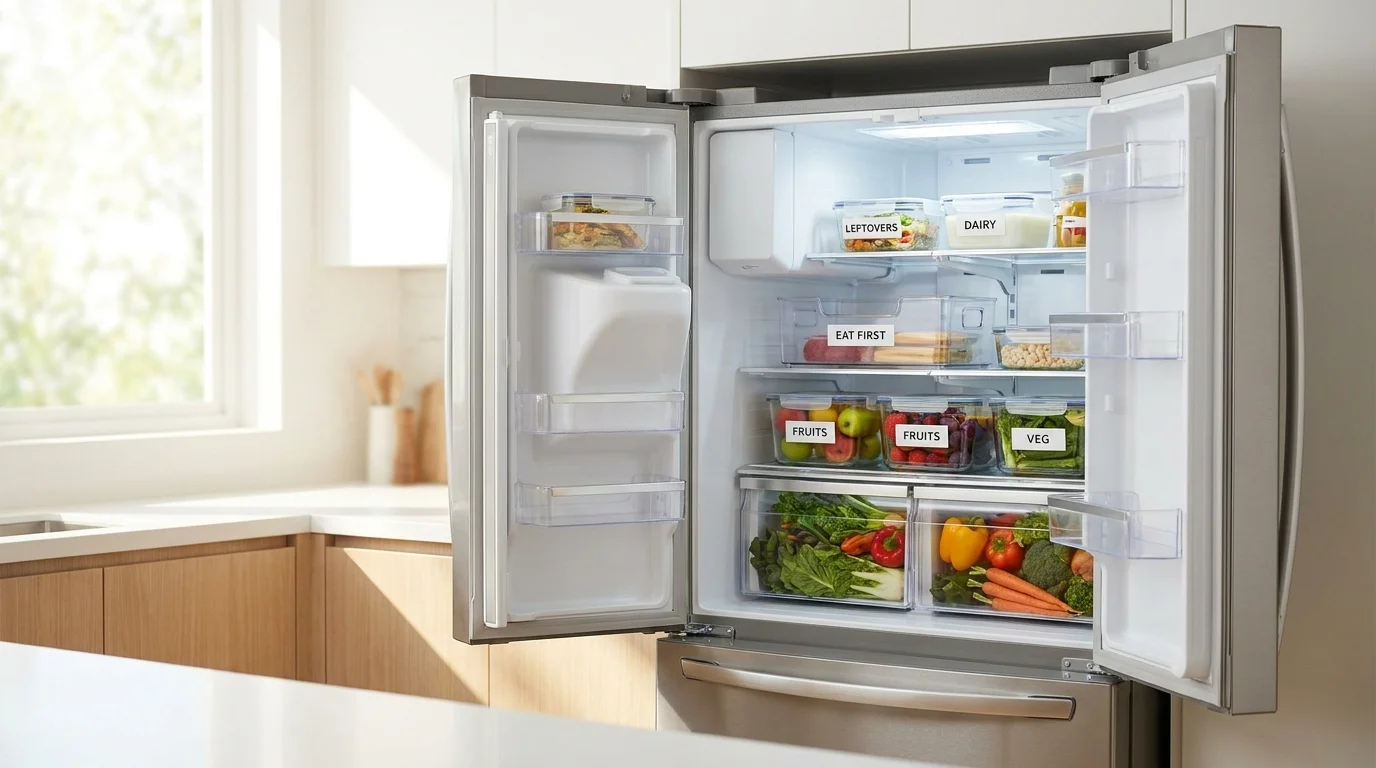
Step 3. Set Up Storage Zones: Logic Matters More Than Decor
The essence of fridgescaping is not to make the fridge look "like on Pinterest," but to ensure food is stored correctly and always visible. Zones help every household member quickly understand where to put things and where to find them.
Top shelf: ready-to-eat food, leftovers, yogurts, items that are "opened and need to be finished."
Middle shelf: dairy products, eggs (better on a shelf than in the door to minimize temperature fluctuations).
Bottom shelf: raw meat/fish in a separate container or on a tray (the coldest zone, plus protection against leaks).
Drawers: vegetables and fruits separately, if possible. Many fruits release ethylene and accelerate the spoilage of vegetables and greens.
Door: sauces, drinks, jams—items that are less sensitive to temperature changes.
Mini visibility rule: place anything that needs to be eaten within the next 1–2 days at eye level. This is the main "anti-loser."
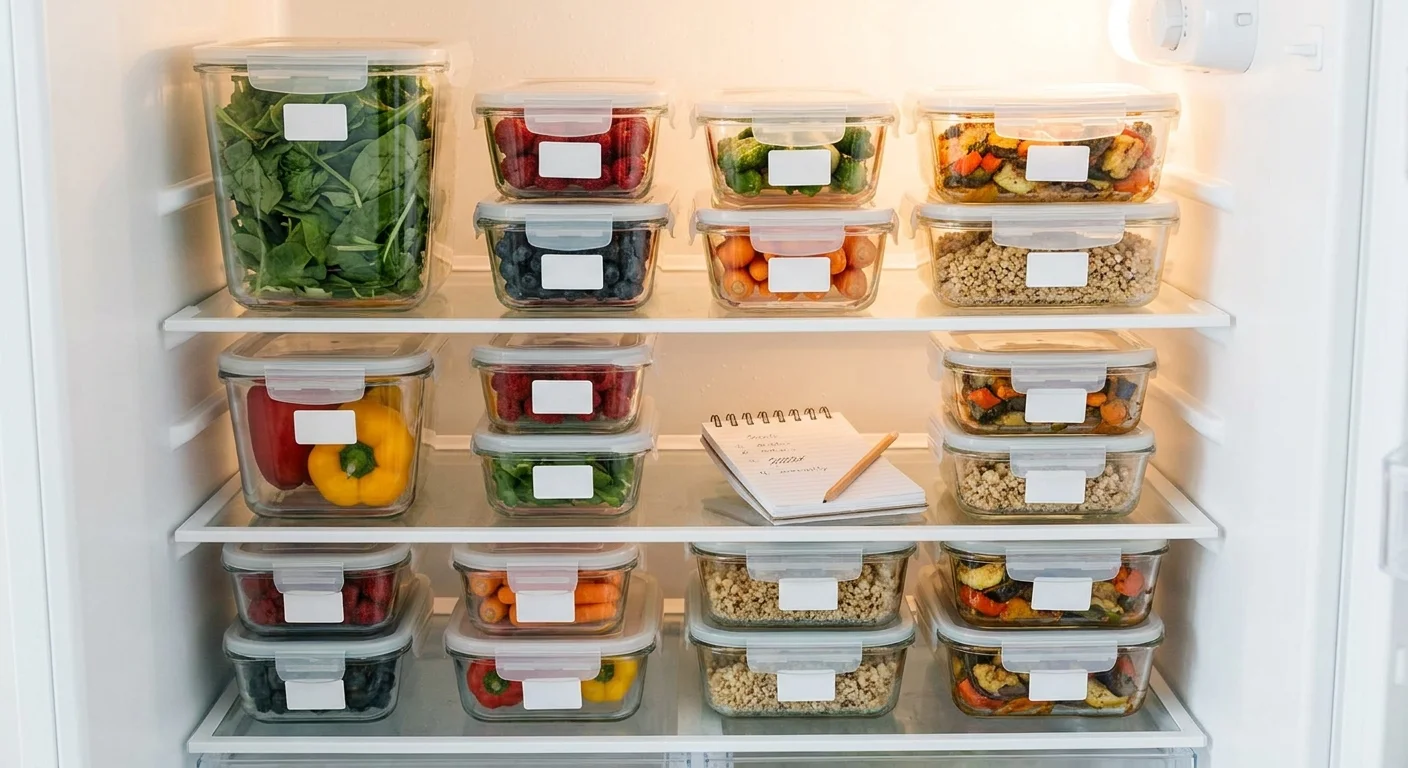
Step 4. Use Containers and Labels: Less Air Means Longer Freshness
Containers in fridgescaping are not for looks but for control: you can see what's inside, they're easy to access, and they help maintain cleanliness. Plus, airtightness slows down drying and odor absorption.
Choose 2–3 types of containers: low, transparent ones for pre-cut items and snacks; medium ones for ready meals; one tall one for greens.
Create an "Eat First" basket: put short-shelf-life items there—opened sour cream, half an avocado, leftover chicken.
Label containers and jars with the opening/preparation date and a brief description of what's inside.
Keep raw meat/fish in a separate zone and a separate tray—this ensures safety and prevents odors.
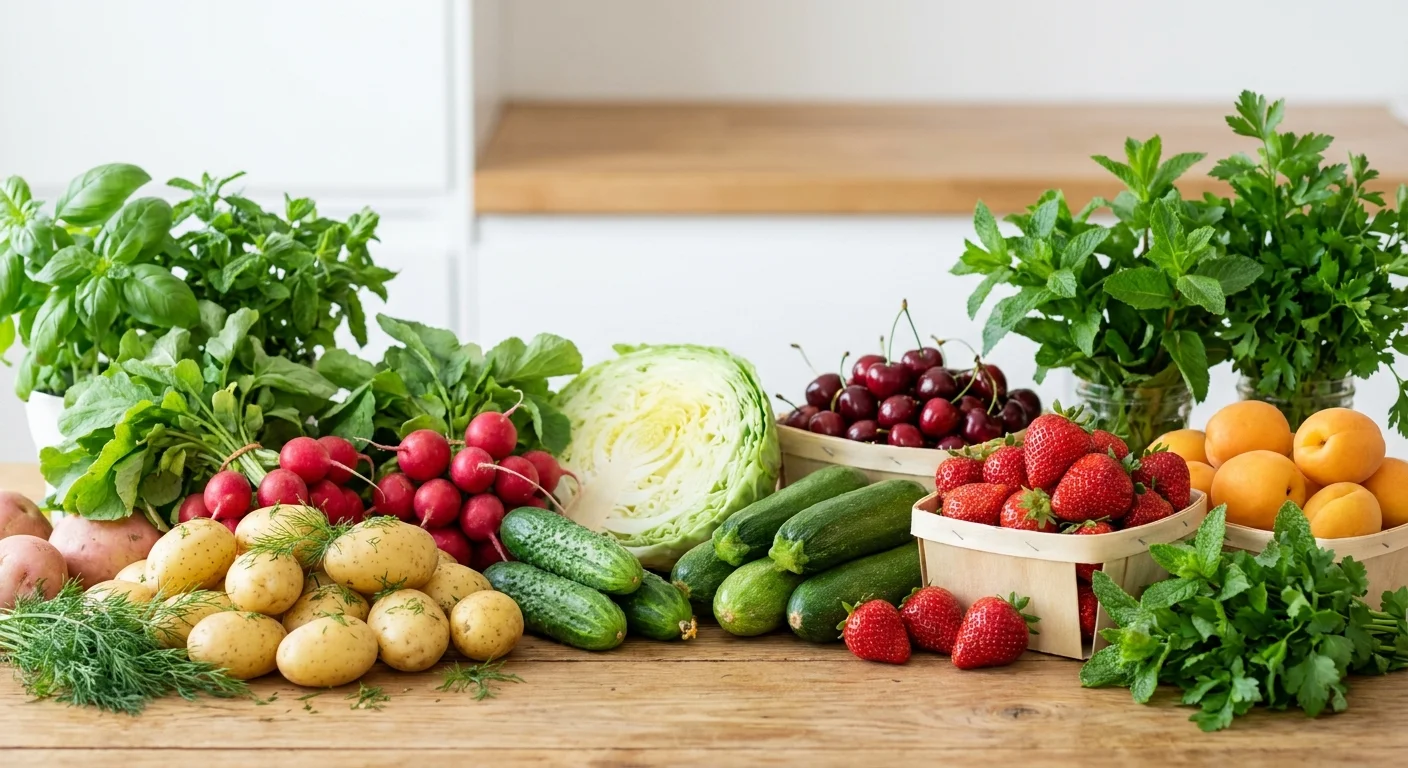
How to Store Greens So They Don't Go Bad
Parsley/dill: pat dry, wrap in a paper towel, place in a bag/container with a loose lid.
Leafy salads: dry leaves + paper towel in a container, don't press down from above.
Green onions: can be stored vertically in a jar with a small amount of water, covered with a bag (if space allows).
Related query often searched: "how to store food in the fridge"—the answer almost always comes down to dryness, airtightness, and proper zones.
Step 5. Implement a "First In, First Out" System: FIFO and a 10-Minute Daily Plan
For fridgescaping to work for weeks, you need a simple system, not a one-time deep clean. The most reliable principle is FIFO (first in, first out): use what you bought or opened first.
When you bring groceries home, place new items behind the old ones, and move older items closer to the front edge of the shelf.
Once a day (or at least every other day), do a "10-minute scan": what needs to be eaten, what should be frozen, what's best cooked today.
Keep one "quick dinner" kit: eggs, cheese, vegetables, sauce—so you don't order delivery when there's food in the fridge.
Life hack for families or roommates: agree that the "Eat First" basket is off-limits for storing new items. It should always remain visible.
Step 6. Sync Your Shopping to Avoid Duplicates and Forgotten Items
One reason food goes to waste is chaotic shopping: you buy another sour cream because "it seems like it ran out," while the old one was sitting in the back. Fridgescaping works best when your shopping list matches what's actually in the fridge.
Keep a shared shopping list and follow the rule: if you see something is running low, add it immediately.
Mark items as bought right in the store—this reduces duplicates and impulse buys "just in case."
After shopping, distribute items into their zones right away, without leaving bags "for later."
If you need a simple shared list without extra apps, it's convenient to use the free mini-app Pickt in Telegram: collaborative shopping lists sync in real time between family members, couples, or roommates. It opens directly in Telegram: t.me/PicktBot/app.
Conclusion
Fridgescaping is not about a perfect picture; it's about a system: audit, cleanliness, zones, containers, FIFO, and synchronized shopping. Spend one hour setting it up and 10 minutes maintaining it—and you'll notice that cooking is easier, shopping is more economical, and there's almost nothing to throw away.
Frequently Asked Questions
-
Is fridgescaping only about making the fridge look nice?
No. Aesthetics are a nice bonus, but the foundation of fridgescaping is functionality: food is visible, stored in the correct temperature zones, and used on time.
-
What is the main mistake that causes food to go to waste?
Invisibility: items get pushed to the back and forgotten. The solution is an "Eat First" basket at eye level and the FIFO principle with every new purchase.
-
Do I need to buy expensive containers for fridgescaping?
Not necessarily. A few transparent containers and labels are enough. What matters more is size (so they fit on the shelves) and airtightness for ready meals and pre-cut items.
-
How can I avoid buying too much when sharing a fridge?
A shared shopping list and the rule "if it's running low, add it to the list immediately" help. For example, Pickt makes it easy to keep a shared list in Telegram and mark purchases in real time to avoid duplicates.